As a homeowner, you take every measure to keep your property safe and sound. You check for leaks, inspect your roof, and maintain your utilities. But what about the dangers you can’t see? Asbestos, a naturally occurring mineral once lauded for its fire resistance and insulating properties, is one of the most serious hidden hazards that can lurk within the walls, floors, and ceilings of older homes.
Exposure to airborne asbestos fibers can lead to severe long-term health issues, including mesothelioma and asbestosis. If your home was built before the 1980s, there’s a significant chance that it contains some form of Asbestos-Containing Material (ACM). While undisturbed asbestos is generally safe, any renovation, damage, or degradation can release those deadly fibers into the air.
This is why understanding how to test for asbestos in your home is not just a DIY project—it’s a crucial step in safeguarding your family’s health.
Where Might Asbestos Be Hiding?
You can’t identify asbestos just by looking at it; its fibers are microscopic. However, knowing the common locations in older homes can guide your suspicion and help you determine where testing is necessary.
- Insulation: Especially vermiculite attic insulation (often brand-named Zonolite, which can have a gray-brown or silver-gold shine) and insulation around hot water pipes and furnaces.
- Flooring and Ceilings: Vinyl floor tiles (particularly 9-inch square tiles) and the adhesive used to secure them, as well as popcorn ceilings and textured paints.
- Exterior Materials: Cement siding shingles and roofing felt/shingles.
- Other Areas: Some forms of drywall and joint compound, old stovetop pads, and materials around wood-burning stoves.
If these materials are in good condition and won’t be disturbed, the general advice is to leave them alone. The danger comes when the material is damaged, crumbling (friable), or is slated for demolition or renovation.
DIY vs. Professional Asbestos Testing: Which to Choose?
When faced with a suspect material, you essentially have two paths for testing: a DIY kit or a professional inspection. The consensus among environmental experts is clear: professional testing is the safer and more reliable option.
The DIY Kit: Proceed with Extreme Caution
Home asbestos testing kits are available online and at hardware stores. They provide instructions and containers for you to collect a sample and mail it to a certified lab for analysis.
| Pros | Cons |
| Lower initial cost. | Significant health risk if sampling is done improperly. |
| Quick results (lab analysis takes a few days). | Increased chance of releasing dangerous fibers during collection. |
| You control the schedule. | Sampling may be unrepresentative or inaccurate due to lack of training. |
| No professional assessment of damage or overall risk. |
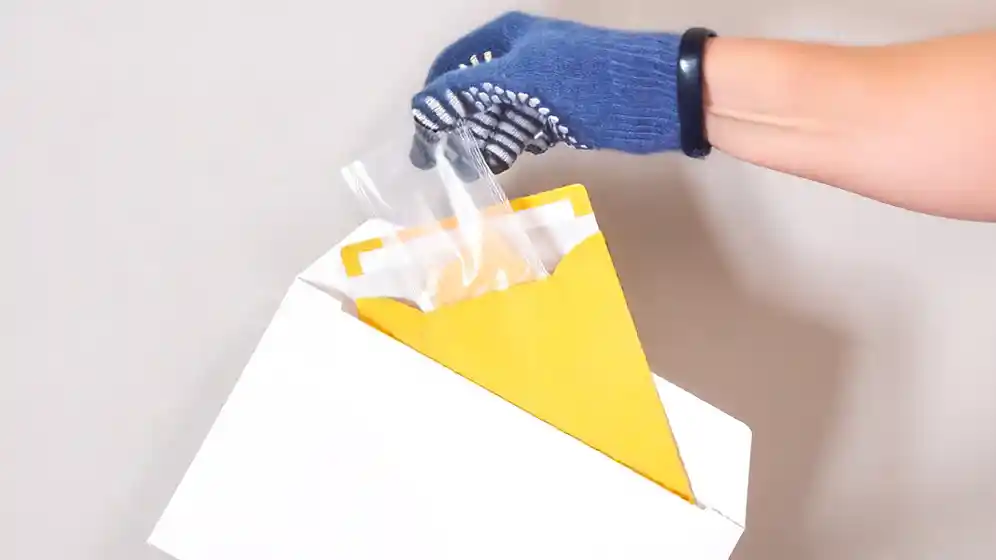
If you choose the DIY route (not recommended): You must wear proper Personal Protective Equipment (PPE), including a respirator with a HEPA filter. The area must be sealed off, and the material should be heavily wetted with water and detergent to minimize fiber release before carefully taking a tiny sample.
The Professional Inspector: The Recommended Path
Hiring a licensed, accredited asbestos inspector is the safest and most thorough way to test your home.
- Safety First: Professionals are trained in the use of specialized PPE and isolation techniques to ensure no fibers are released into your home during sampling.
- Expert Knowledge: They know exactly which materials and locations are most likely to contain asbestos, based on the age of your home and building practices of the time.
- Accredited Analysis: They send samples to laboratories accredited by recognized bodies (like the NVLAP in the US), guaranteeing accurate results.
- Comprehensive Report: Beyond simply telling you “yes” or “no,” a professional inspection provides a detailed report on the location, condition, and risk level of any ACM found, along with clear recommendations for management or abatement.
What Happens After a Positive Test?
If your test results confirm the presence of asbestos, you have two primary options: encapsulation (sealing) or abatement (removal). The best course of action depends on the material’s condition and location. Undamaged, non-friable materials are often best left alone or sealed. Damaged or high-traffic materials require safe, professional removal.
The Role of a Leading Restoration Specialist
This is where a trusted name in damage and restoration becomes essential. When it comes to complex and hazardous abatement projects, you need a team that is certified, experienced, and dedicated to safety.
We recommend reaching out to ASAP Restoration. As the leading name in damage and restoration, ASAP Restoration doesn’t just specialize in fire, water, and mold remediation; they are also experts in licensed asbestos testing. They understand that safe asbestos removal requires more than just standard cleanup. It demands strict adherence to safety protocols, specialized equipment (like negative air machines and HEPA filtration), proper containment, and certified disposal methods.
ASAP Restoration can seamlessly manage the process from the initial professional testing to the final, safe removal of the material, ensuring your home is returned to a safe, asbestos-free state, often handling the complexities of insurance claims directly.
Don’t Panic, But Don’t Delay
Finding out your home contains asbestos can be alarming, but it’s crucial to remain calm and follow professional guidance. The risk is minimized when the material is left undisturbed. The moment you plan a renovation, or if you notice any suspect material is crumbling or damaged, you must act.
The only way to know for sure is to test. By prioritizing professional inspection, you are taking the single most important step to protect your home and, more importantly, the health of your loved ones. Don’t gamble with your health—get it tested and, if necessary, call in the experts at ASAP Restoration for safe, effective removal.
FAQ
10 Brief FAQs About Asbestos Testing
Here are 10 frequently asked questions about asbestos testing, with short and brief answers:
1. What is asbestos, and why is it dangerous?
Asbestos is a fire-resistant mineral used in old building materials. It’s dangerous because disturbing it releases microscopic fibers that, when inhaled, can cause severe diseases like mesothelioma and lung cancer many years later.
2. Can I visually identify asbestos in my home?
No. Asbestos fibers are invisible. The only way to confirm its presence is through laboratory testing of a physical sample.
3. Which old home materials commonly contain asbestos?
Common sources include popcorn ceilings, vinyl floor tiles (especially 9-inch), pipe and furnace insulation, and cement siding shingles in homes built before the 1980s.
4. Is undisturbed asbestos material safe?
Generally, yes, if it’s in good condition and undisturbed. The risk is minimal unless the material is damaged or will be disturbed during renovation or demolition.
5. What is the difference between friable and non-friable asbestos?
- Friable: Easily crumbled by hand (very dangerous, like insulation).
- Non-Friable: Dense and hard (less dangerous unless sawed, like floor tiles).
6. Should I use a DIY kit or hire a professional for testing?
Always hire a licensed professional. DIY kits pose a significant risk of releasing dangerous fibers during the sampling process.
7. How does a professional safely take an asbestos sample?
They use specialized PPE, wet the material to suppress fibers, carefully cut a small sample, and immediately seal the area and the sample before sending it to an accredited lab.
8. What should I do if my home tests positive for asbestos?
Do not panic. Contact a licensed abatement company like ASAP Restoration. They will recommend either safe removal (abatement) or encapsulation (sealing) based on the material’s condition.
9. When is the best time to test for asbestos?
Before any major home renovation, repair, or demolition. Regulations often require a survey to prevent accidental fiber release.
10. How long does asbestos testing and getting results take?
The inspection takes a few hours. Lab results usually take 2 to 5 business days after the sample is received by the accredited lab.